Golden Crispy Baked Chicken Strips: A Family Favorite Made Easy 🍗✨🔥
1. Introduction
Are you craving a delicious, crispy snack or meal that the whole family will love? baked chicken tenders are the answer! This recipe for crispy chicken tenders offers a healthier alternative to fried versions, thanks to the oven-baking method that ensures a golden, crunchy exterior. Perfect as a quick dinner, party appetizer, or game day snack, these homemade chicken tenders are easy to prepare and irresistibly tasty. With just a handful of pantry ingredients, you can create restaurant-quality baked chicken tenders right in your kitchen without the mess of frying.
2. Ingredients for Perfect Baked Chicken Tenders
- 1 pound boneless, skinless chicken breasts or tenders
- 1 cup all-purpose flour
- 2 large eggs
- 1 cup panko breadcrumbs
- ½ cup grated Parmesan cheese (optional, for extra flavor)
- 1 teaspoon garlic powder
- 1 teaspoon smoked paprika
- ½ teaspoon black pepper
- ½ teaspoon salt
- Cooking spray or olive oil for spraying
3. Step-by-Step Instructions for Making Crispy Baked Chicken Tenders
Preparation of Chicken
Start by preheating your oven to 400°F (200°C). Cut the chicken breasts into evenly-sized strips, about 1 inch wide. Pat dry with paper towels to ensure the coating sticks well.
Setting up the Breading Station
Arrange three shallow bowls: one with flour, one with beaten eggs, and one with mixed panko, Parmesan cheese, garlic powder, paprika, salt, and pepper. This will be your dredging setup for the perfect crispy chicken tenders.
Dredging and Coating
First, coat each chicken strip in the flour, shaking off excess. Then, dip into the beaten eggs, ensuring full coverage. Finally, dredge the chicken in the breadcrumb mixture, pressing gently to adhere the coating evenly. Place the coated chicken strips on a baking sheet lined with parchment paper or a silicone baking mat.
Baking the Chicken Tenders
Spray the chicken tenders lightly with cooking spray or brush with olive oil. Bake for 20-25 minutes, flipping halfway through, until golden brown and cooked through. For extra crunch, broil for an additional 2-3 minutes, watching carefully to prevent burning.
4. Tips for Achieving the Perfect Crispy Texture
Using panko breadcrumbs and spraying with a bit of oil before baking ensures a crispy exterior. Avoid overcrowding the baking sheet to allow proper air circulation. For an added flavor boost, sprinkle with herbs or spices before baking.
5. How to Store and Reheat Leftover Baked Chicken Tenders
Allow leftovers to cool completely before storing in an airtight container in the refrigerator for up to 3 days. Reheat in the oven at 375°F (190°C) for 10 minutes or until heated through, maintaining that crispy texture. For quicker reheating, use an Ninja Air Fryer Pro Crisp & Roast, which restores crispiness beautifully.
6. Creative Serving Suggestions and Dipping Sauces
Serve these homemade chicken tenders with classic sides like fries, coleslaw, or a crisp salad. They’re perfect for dipping in honey mustard, ranch, buffalo sauce, or ketchup. For a complete meal, consider wrapping with fresh veggies in a whole-wheat wrap or adding to pasta dishes like the cheesy garlic chicken wraps.
7. Frequently Asked Questions (FAQs)
Can I make these baked chicken tenders gluten-free?
Yes, substitute all-purpose flour and Panko breadcrumbs with gluten-free alternatives available at your local grocery store.
How long does it take to prepare and bake homemade chicken tenders?
The entire process, including prep and baking, takes approximately 30-35 minutes, making it a quick and easy family dinner or snack.
Can I use chicken thighs instead of tenders?
Absolutely! Just cut chicken thighs into strips similar to tenders. They tend to be juicier and more flavorful.
Is baking healthier than frying?
Yes, baking significantly reduces the amount of oil used, making baked chicken tenders a healthier choice while still delivering a crispy texture.
8. Kitchen Tools That You Might Need for This Recipe
- Ninja Air Fryer Pro Crisp & Roast: Perfect for reheating leftovers or achieving extra crispiness without added fat.
- CAROTE Premium 16pc Nonstick Cookware Set: Ensures even cooking and easy cleanup for your baking sheet and prep dishes.
- KitchenAid Classic Iconic Stand Mixer: Ideal for mixing batter or breading components with ease.
- Ninja SLUSHi Pro RapidChill Drink Maker: Stay refreshed with chilled drinks while you cook or enjoy your meal.
9. Conclusion
Enjoy the delightful crunch and savory flavor of these baked chicken tenders without the guilt of frying. This easy recipe guarantees tender, juicy inside and irresistibly crispy outside, making it a perfect addition to your weekly family dinners or party menus. With minimal prep and clean-up, you’ll be proud to serve homemade crispy chicken tenders that rival restaurant favorites. Give this recipe a try and transform simple ingredients into a delicious, wholesome meal everyone will love!
Print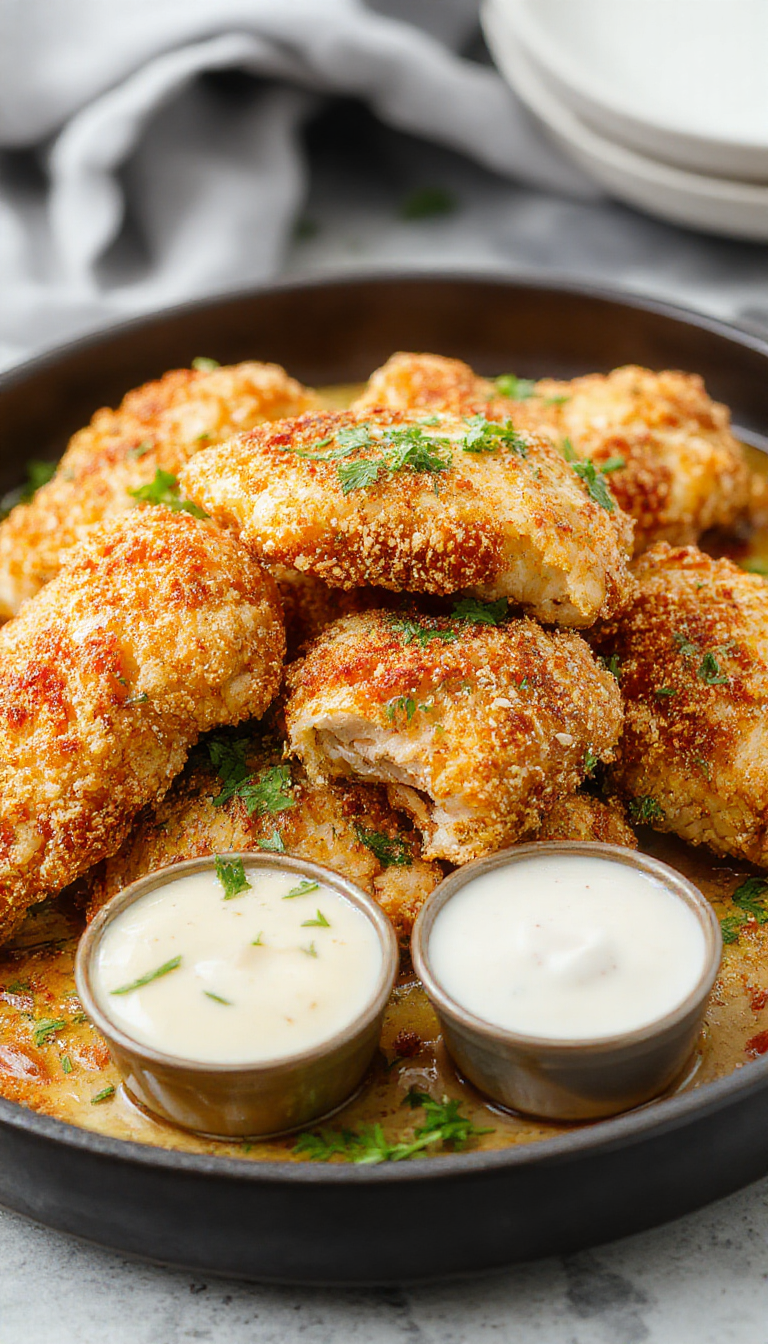
Golden Crispy Baked Chicken Strips: A Family Favorite Made Easy
Golden Crispy Baked Chicken Strips are a family-friendly, healthier alternative to fried chicken tenders. Crispy on the outside, tender on the inside, these homemade chicken strips are easy to make with pantry staples. Perfect for quick dinners, snacks, or party appetizers, they deliver maximum flavor with minimal effort.
- Total Time: 30-35 minutes
- Yield: 4 servings
Ingredients
- 1 pound boneless, skinless chicken breasts or tenders
- 1 cup all-purpose flour
- 2 large eggs
- 1 cup panko breadcrumbs
- ½ cup grated Parmesan cheese (optional, for extra flavor)
- 1 teaspoon garlic powder
- 1 teaspoon smoked paprika
- ½ teaspoon black pepper
- ½ teaspoon salt
- Cooking spray or olive oil for spraying
Instructions
- Preheat your oven to 400°F (200°C). Cut the chicken into 1-inch wide strips and pat dry.
- Set up three shallow bowls: one with flour, one with beaten eggs, and one with breadcrumb mixture (panko, Parmesan, garlic powder, paprika, salt, and pepper).
- Dredge each chicken strip in flour, then dip into the egg, and finally coat with the breadcrumb mixture. Place on a baking sheet lined with parchment paper.
- Spray the coated chicken strips with cooking spray or lightly brush with olive oil. Bake for 20-25 minutes, flipping halfway, until golden and cooked through. Broil for an extra 2-3 minutes for extra crispiness if desired.
Notes
- Using panko breadcrumbs gives a light, crispy texture.
- Ensure even spacing on the baking sheet for maximum crunch.
- Sprinkling herbs or extra spices before baking boosts flavor.
- Prep Time: 10 minutes
- Cook Time: 20-25 minutes
- Category: Main Course
- Method: Baking
- Cuisine: American
- Diet: Healthy
Nutrition
- Serving Size: 4 pieces
- Calories: 310 Kcal
- Sugar: 2g
- Sodium: 520mg
- Fat: 12g
- Saturated Fat: 3g
- Unsaturated Fat: 7g
- Trans Fat: 0g
- Carbohydrates: 30g
- Fiber: 2g
- Protein: 25g
- Cholesterol: 75mg